Mathpix for Organizations
Organizational Mathpix accounts are best for organizations and teams who want to purchase many Mathpix subscriptions and have organizational billing features.
Organizational Pricing
We have discounted monthly and yearly pricing plans for Mathpix Organizations:
Monthly: $9.99 / month
- First two users (“seats”) included in the price
- 3-49 seats: $4.49 / seat / month
- 50+ seats: $3.99 / seat / month
- Up to 5,000 images and 1,000 PDF pages per seat (pooled)
Yearly: $99.90 / year
- First two users included in price.
- 3-49 Users: $44.90 / seat / year
- 50+ Users: $39.90 / seat / year
- Up to 60,000 images and 12,000 PDF pages per seat (pooled)
Seats can be assigned or reassigned to new users at any time in your organizational account settings.
Creating a Mathpix Organization
To create a Mathpix Organization, first create an individual Mathpix account.
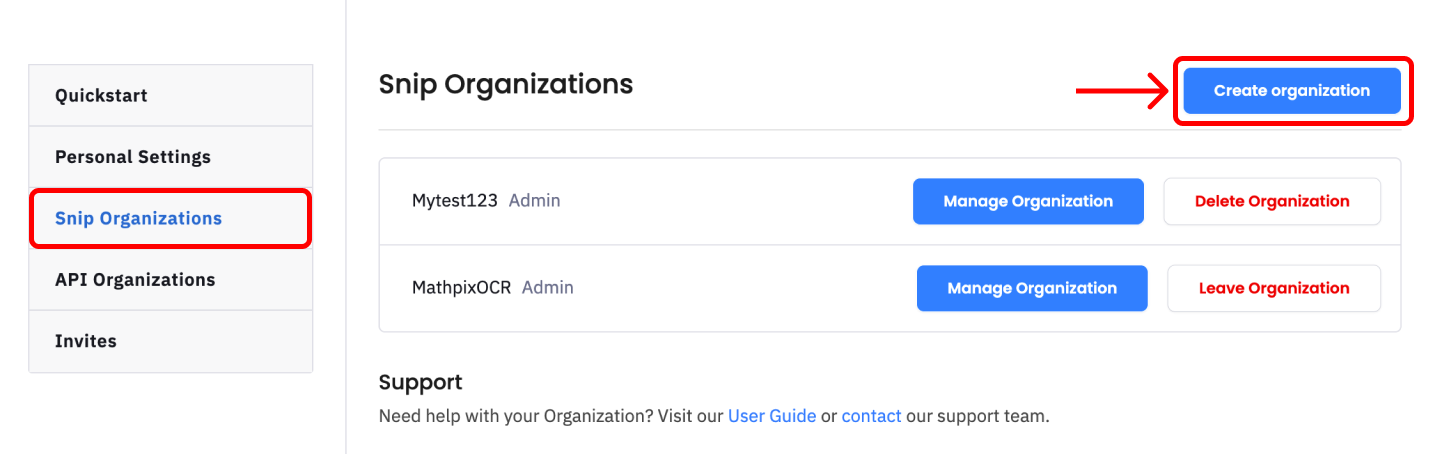
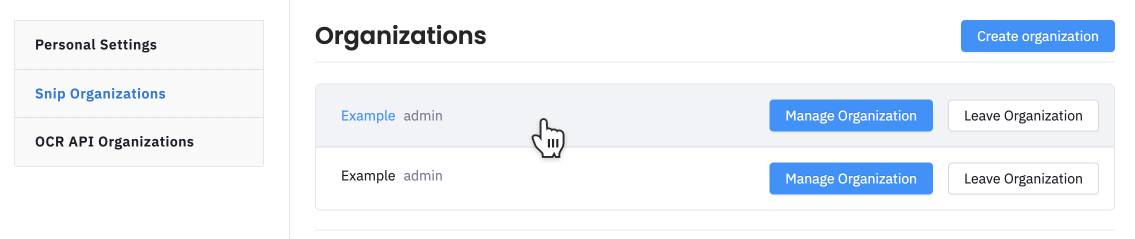
Next, navigate to the Snip Organizations tab of Mathpix Accounts. Click Create organization. Note that you will be the administrator of the organization. If you do not wish to have this role, please have the intended admin create the organization from their Mathpix account.
Next you will be prompted to enter the organization’s name and billing email. This email will receive all organizational related invoices.
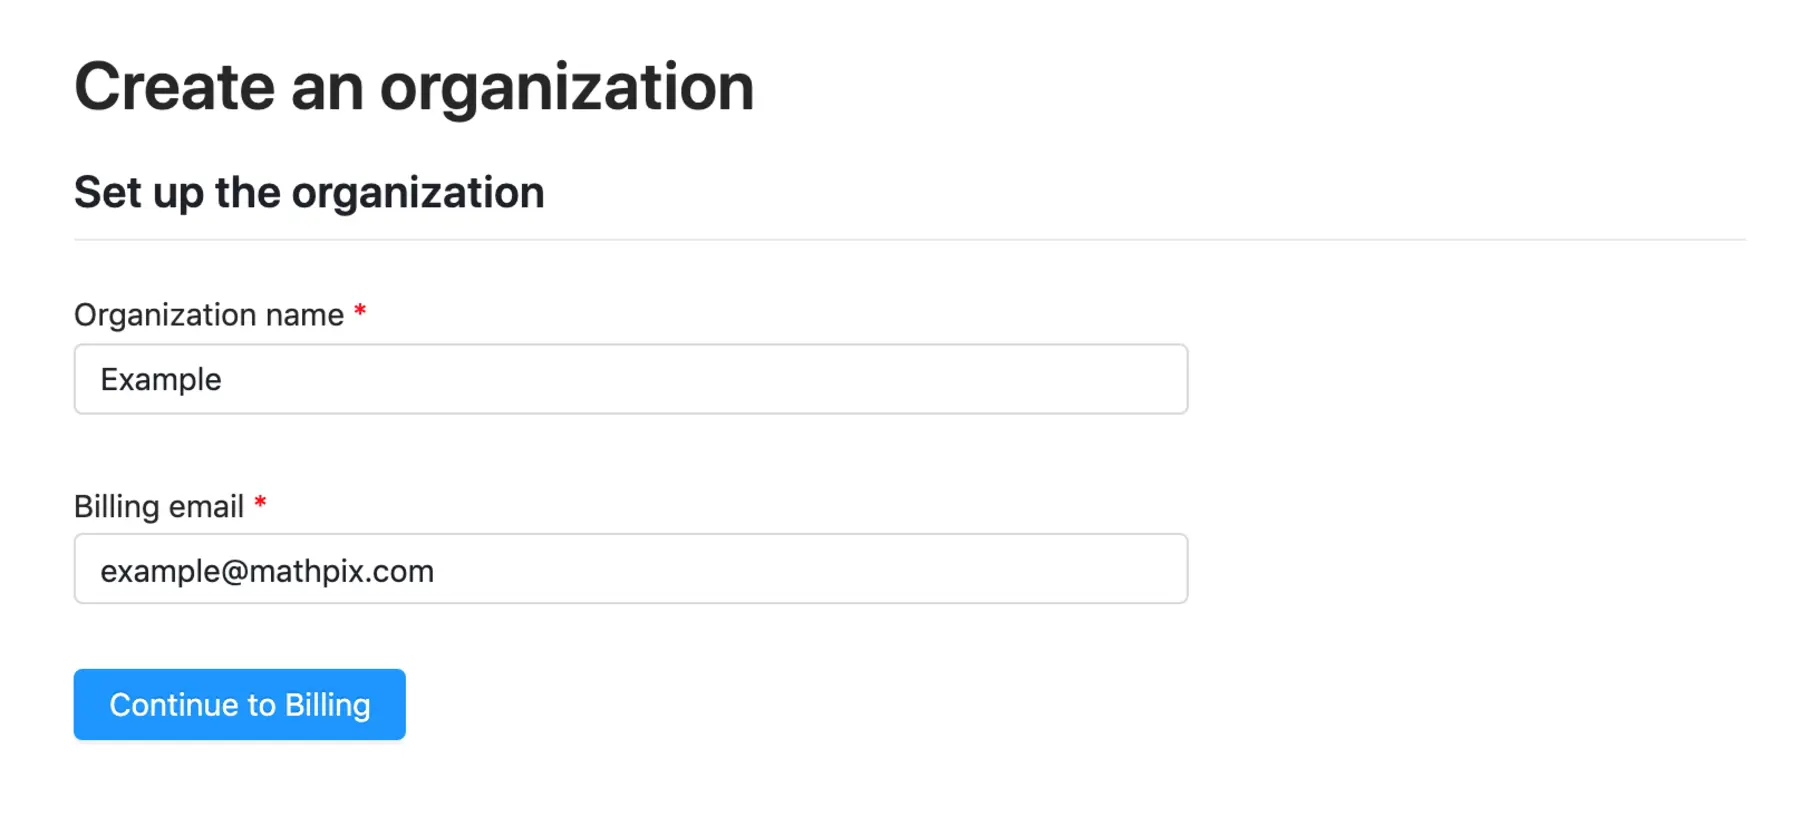
Once you’ve entered the organization name and email, click Continue to Billing.
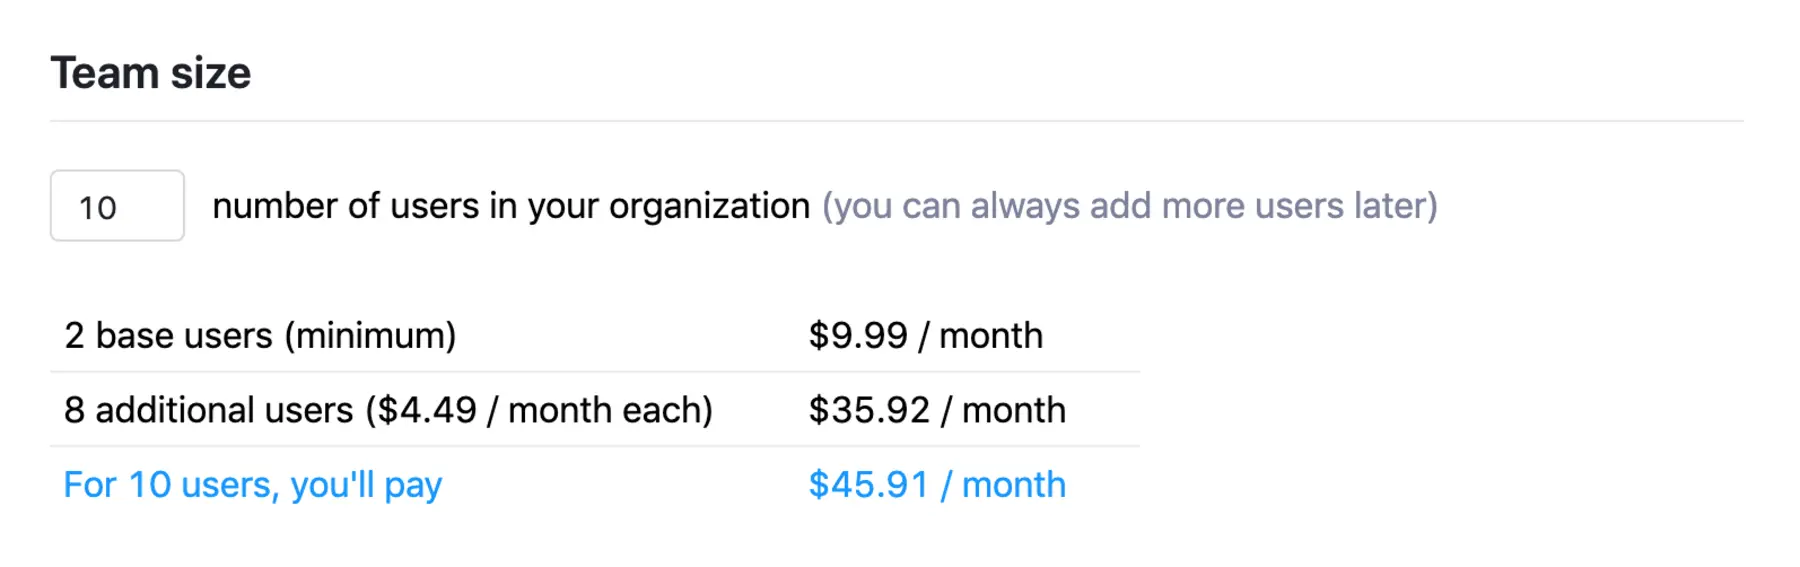
Now you must choose whether you would like to proceed with monthly or yearly billing plan by selecting your desired option. Next, enter the number of seats you would like to purchase for your organization. Don’t worry, you can always add more seats later if needed. Once you’ve entered the number of seats needed, you will see exactly what you will pay each month or year.
Once you’ve chosen your plan and entered your team size, click Enter Billing Information You should see a window appear with the option to add credit card or PayPal information.
You will know that you have entered your payment method information successfully when you see the button Finish Creating Organization. Once you’ve clicked that button, your organization is officially created. You will automatically be redirected to your new organizations settings.
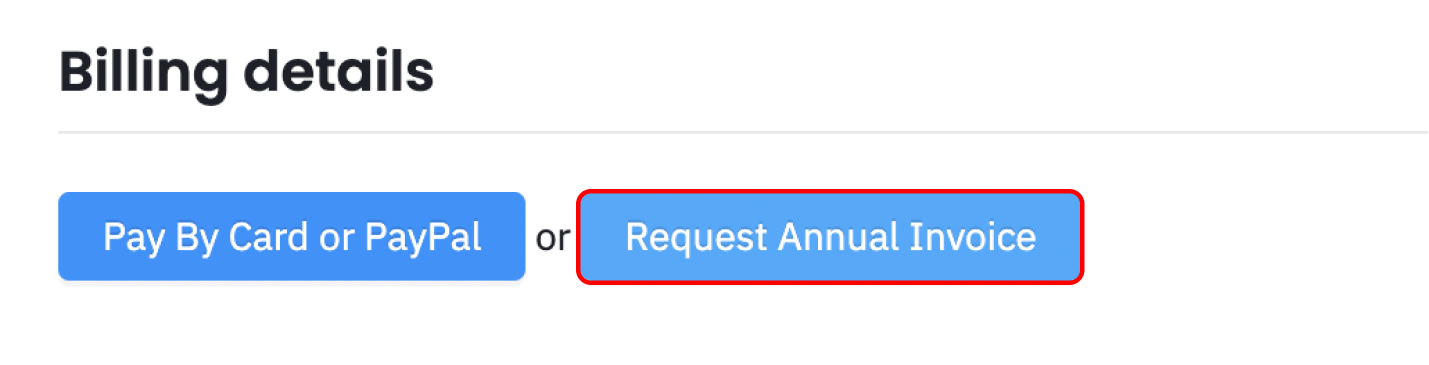
If you select the yearly billing plan, you can choose to pay via invoice instead of via credit card. You will see this option before processing the payment for the first time. If you have chosen another payment option when creating an organization, you can always request an annual invoice later in your Profile settings.
Once your invoice is generated, it will be sent directly to your registered email address. In this email you can find all the details about the invoice, including the invoice number and amount due.
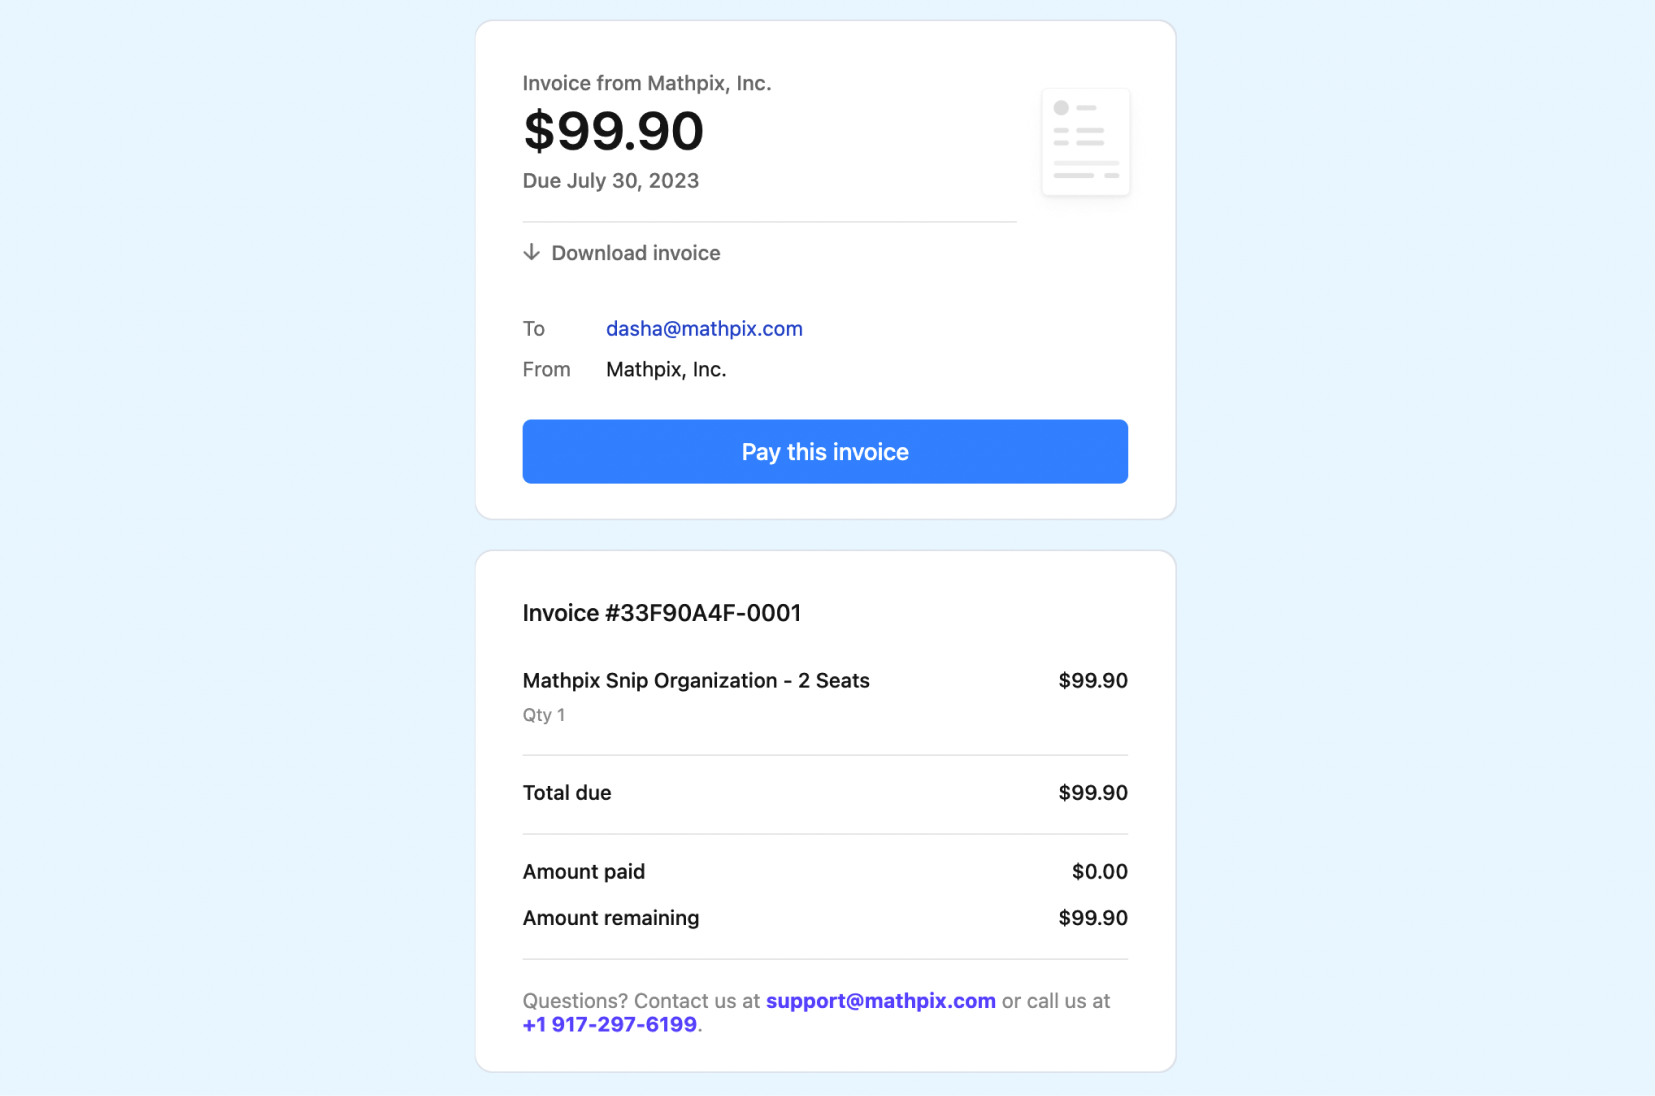
If you want to download your invoice, click Download invoice in the email or find the attached PDF file.
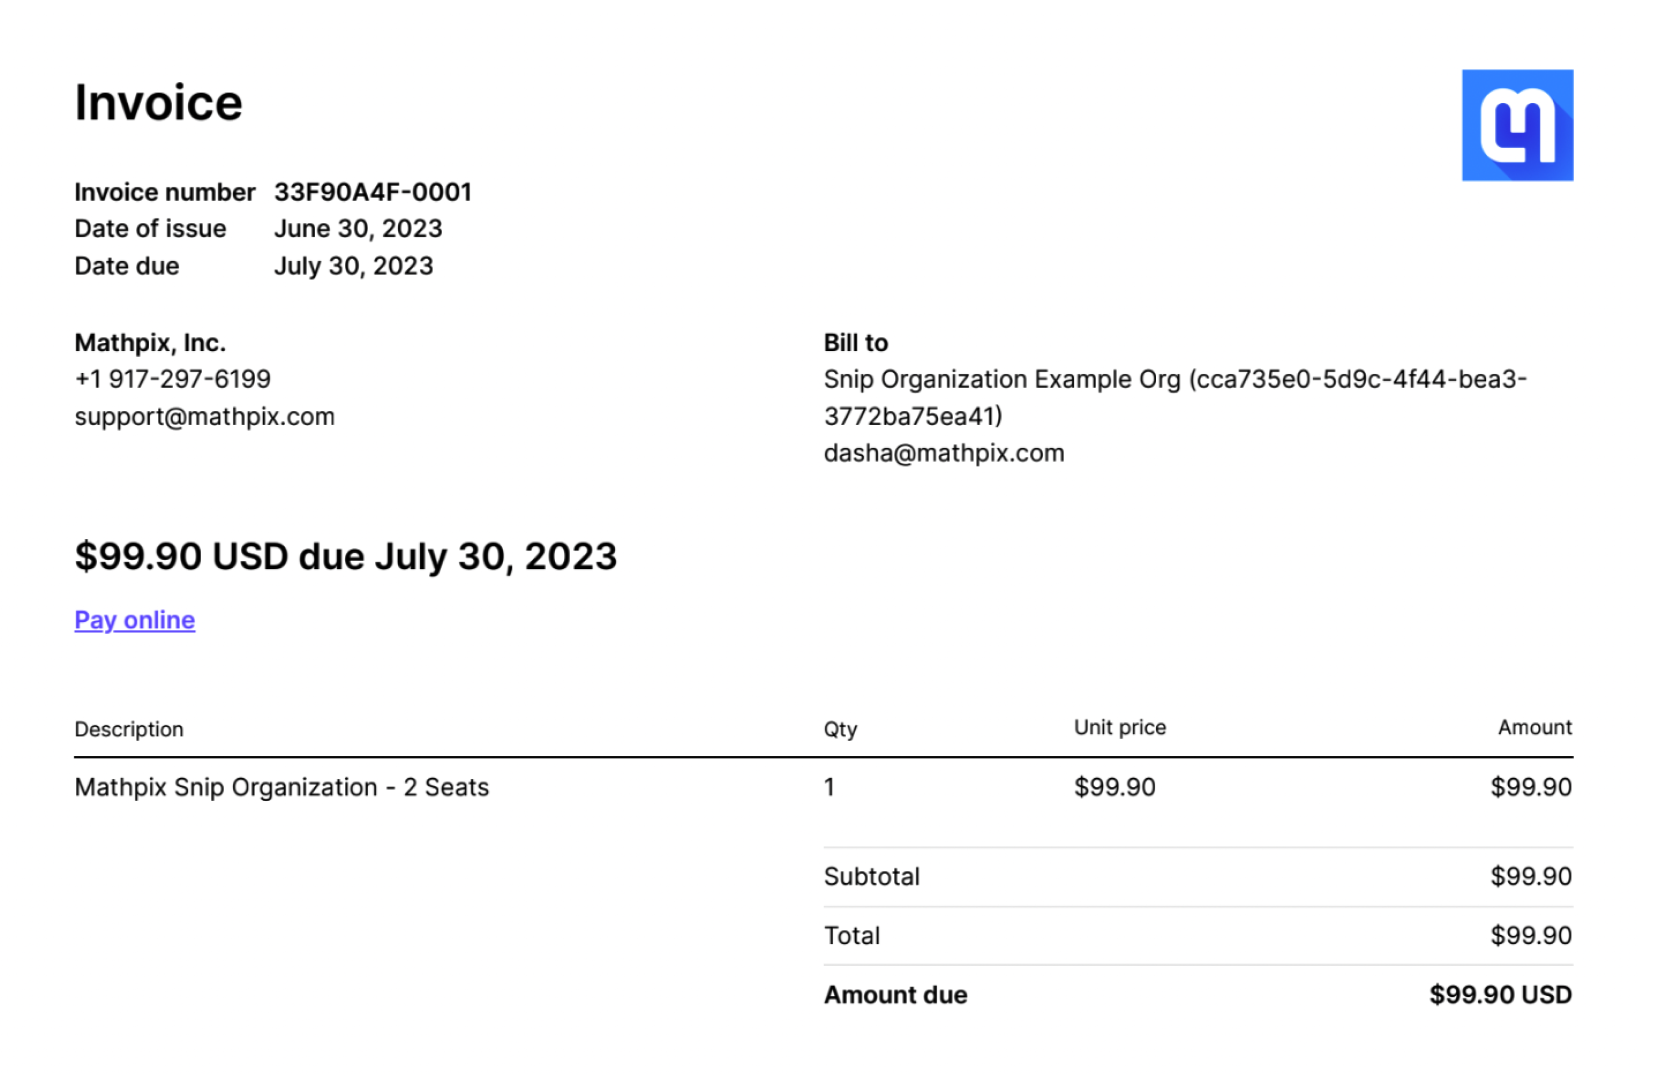
Go to the payment page from the previewed invoice in the email (click Pay this invoice) or from the downloaded file (click Pay online). You will be redirected to our secure payment gateway. Select your payment method and follow the instructions on the payment gateway to complete your payment transaction securely. For our Organizational subscription, we accept payments by credit card, debit card, Google Pay, Link (by Stripe), and bank transfer.

Once the invoice has been paid, your organization will be activated and you will be able to access your Organization settings.
Organization Settings
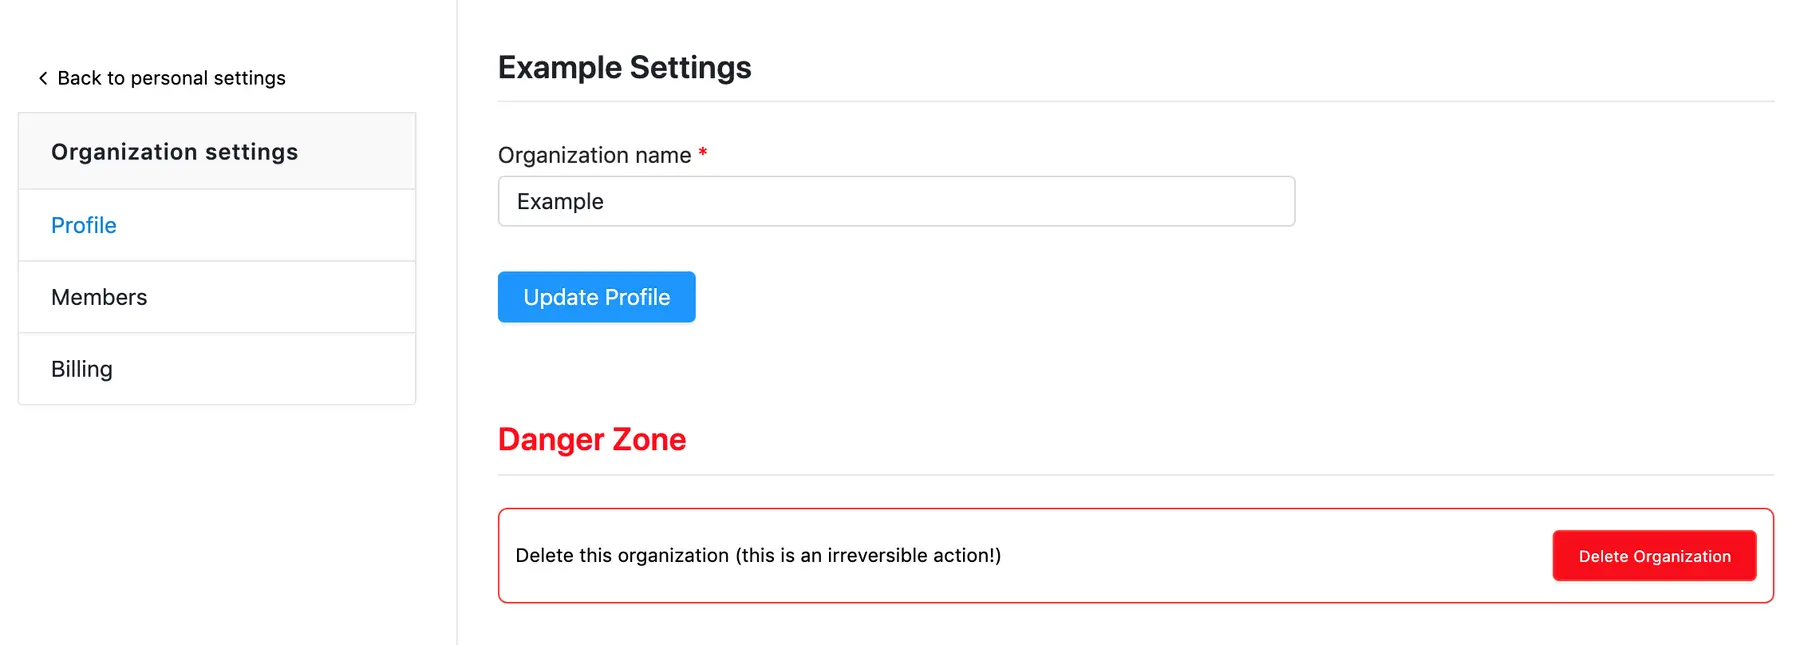
Profile
- Change organization name
- Delete organization
Members
- Invite and manage organization members
Billing
- Update billing email
- Update payment information
- Add or remove seats
- Download invoices
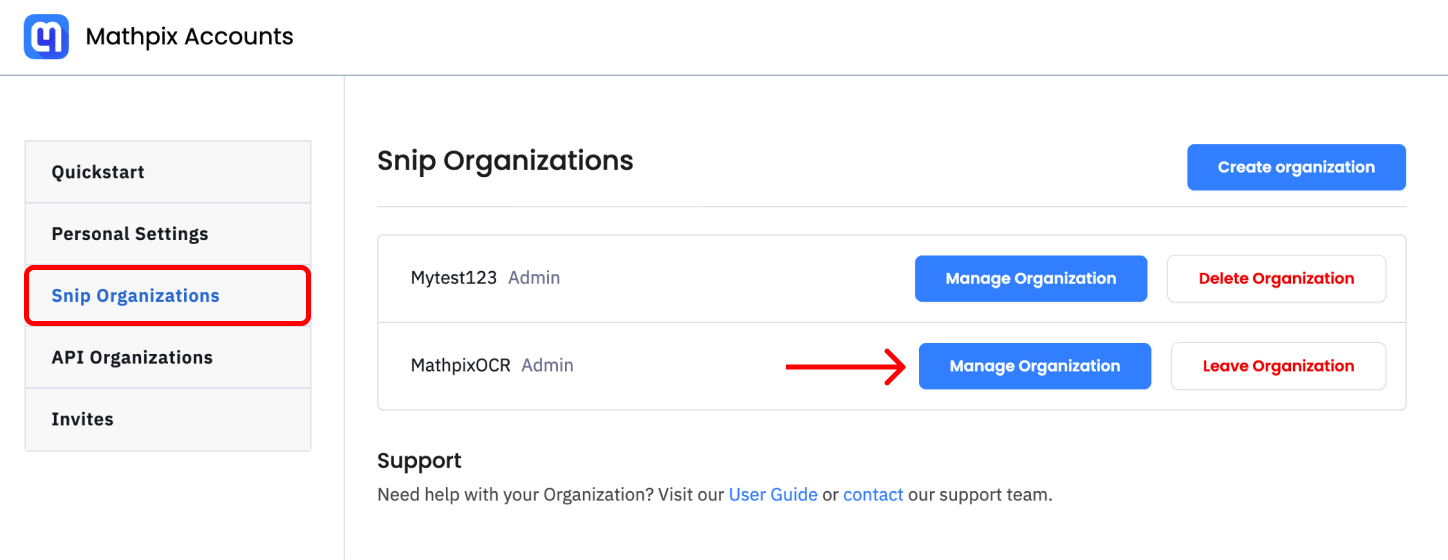
To open your organization settings, navigate to the Snip Organizations tab and click the name of the organization that you need to manage.
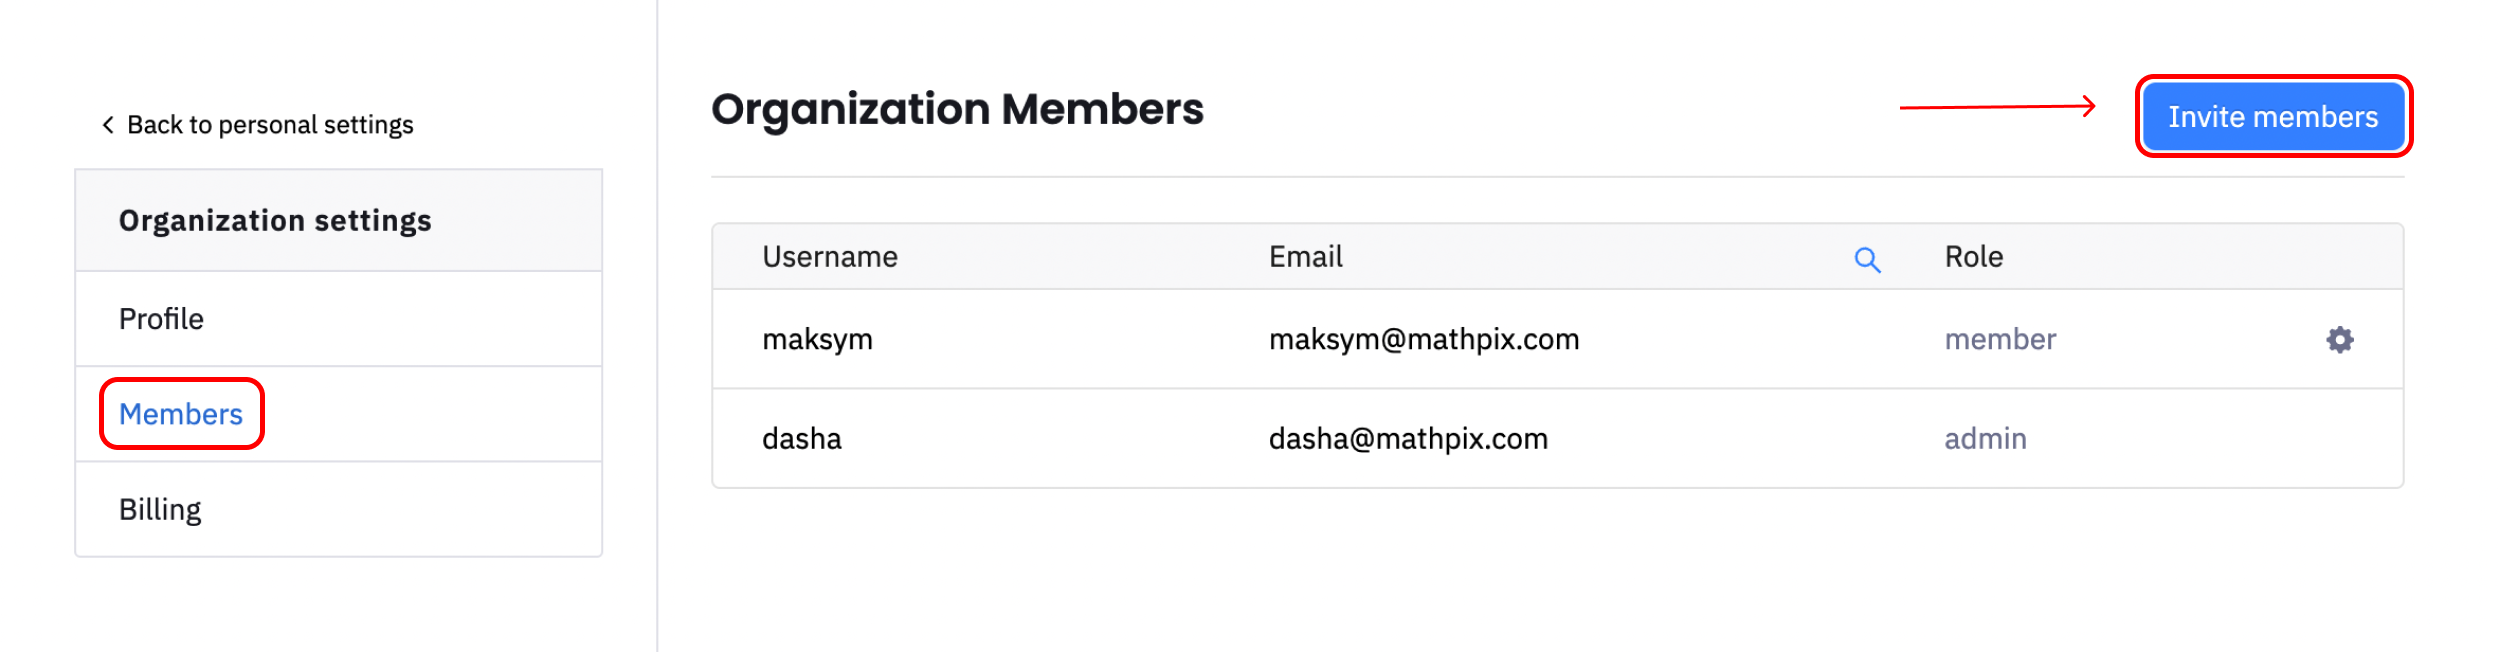
Invite and manage organization members
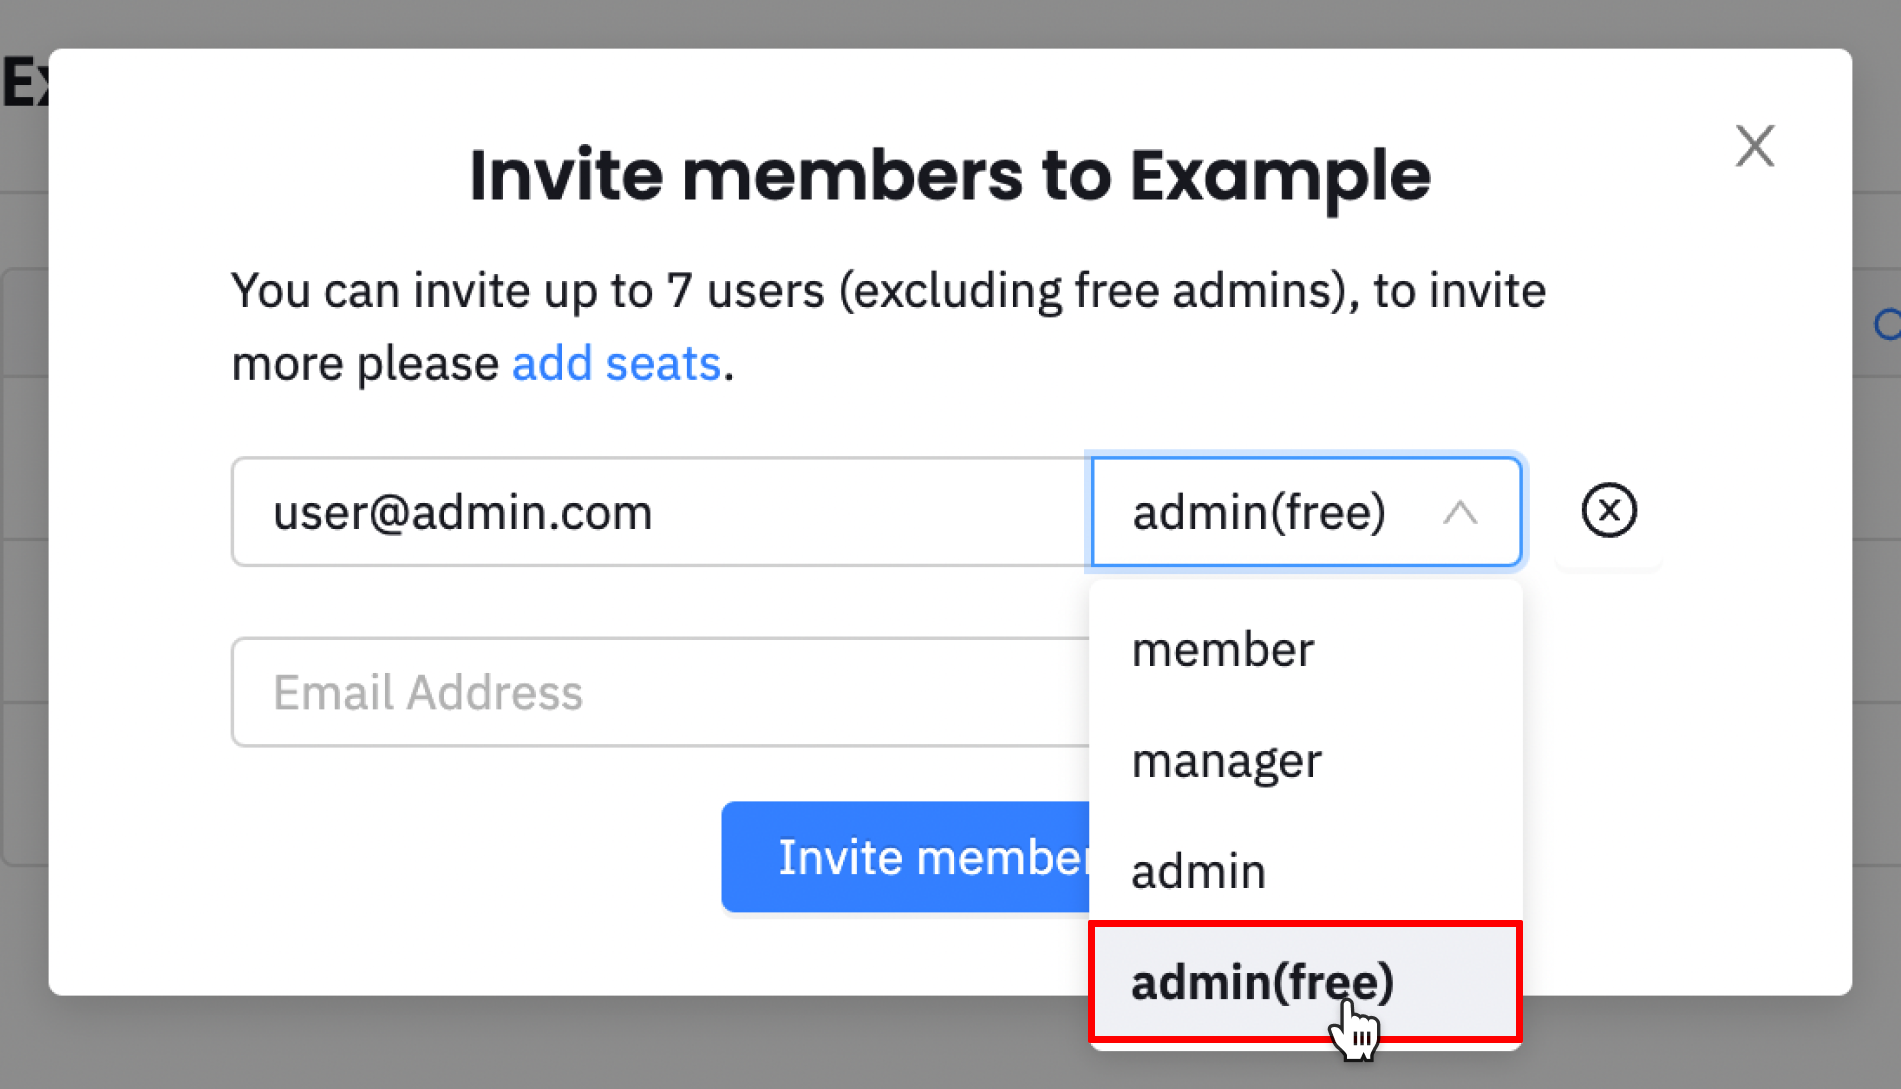
Open organization settings and find the list of members. Click Invite members.
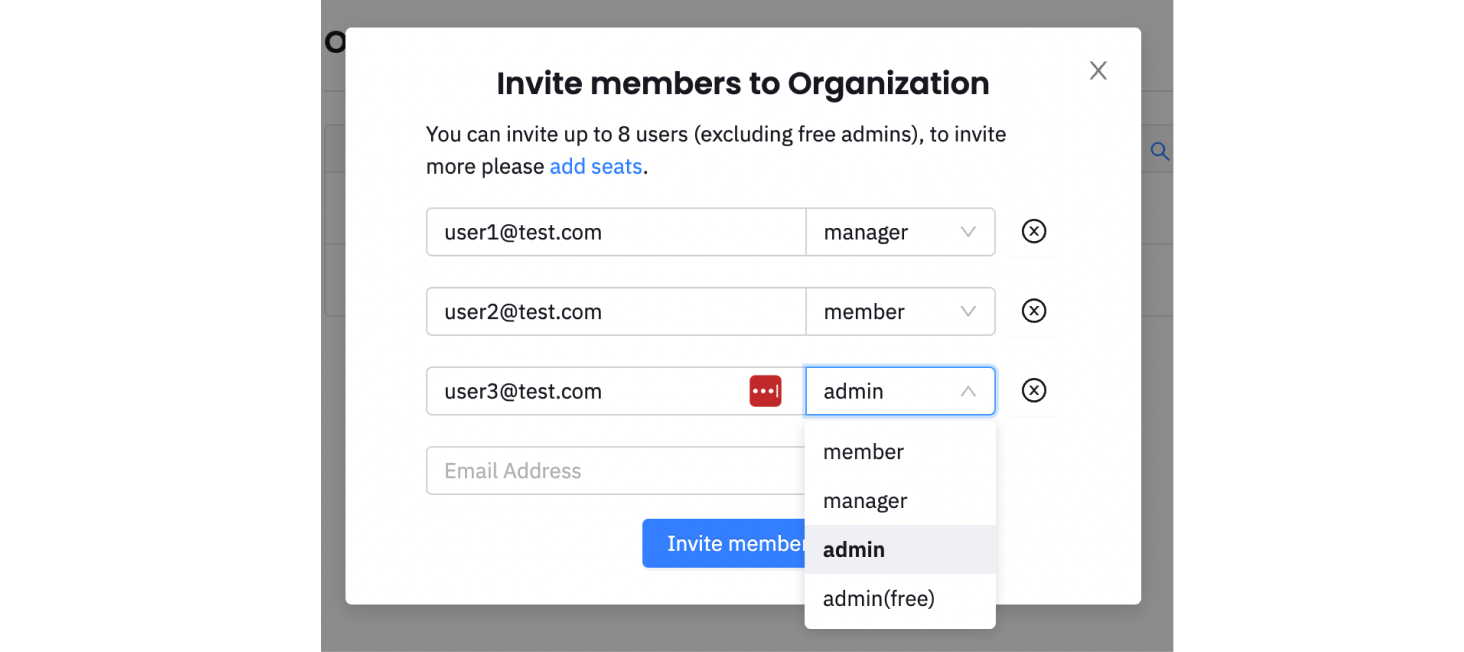
Now you can enter email addresses of your invitees. When you click Invite members again, they will receive an invitation by email.
If a person already has a Mathpix account, he will see an invite at his personal profile page.

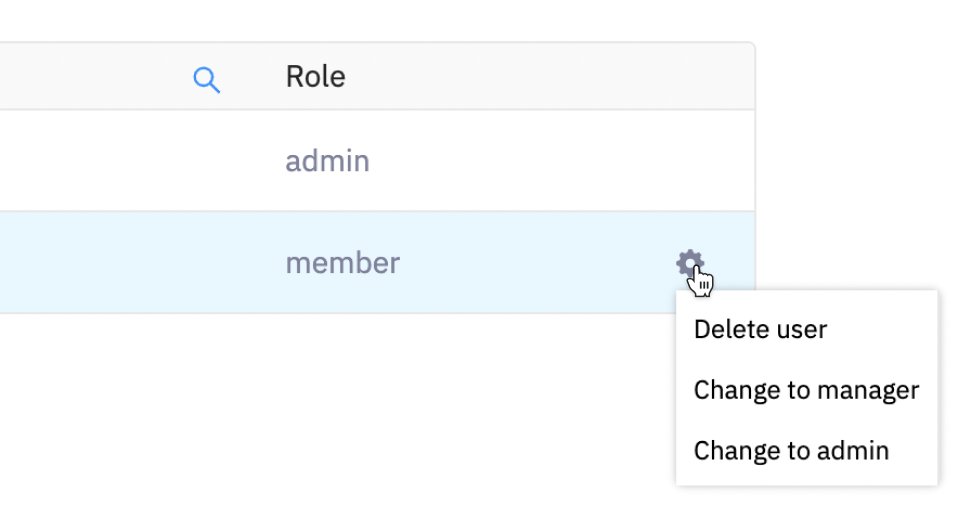
To delete a user or to manage members roles, navigate to the list of members, choose a member you want to manage, and find the Settings icon.
Admins vs. Free admins vs. Managers
Admin:
- Can add users;
- Can update payment information;
- Can enable overages;
- Can delete the organization;
- PDFs and Snips processed go towards the Organization’s total usage.
Free admin:
- Can add users;
- Can update payment information;
- Can enable overages;
- Can delete the organization;
- PDFs and Snips processed go towards personal usage.
Organizations are not charged for a Free Admin seat.
Manager:
- Can add users;
- PDFs and Snips processed go towards the Organization’s total usage.
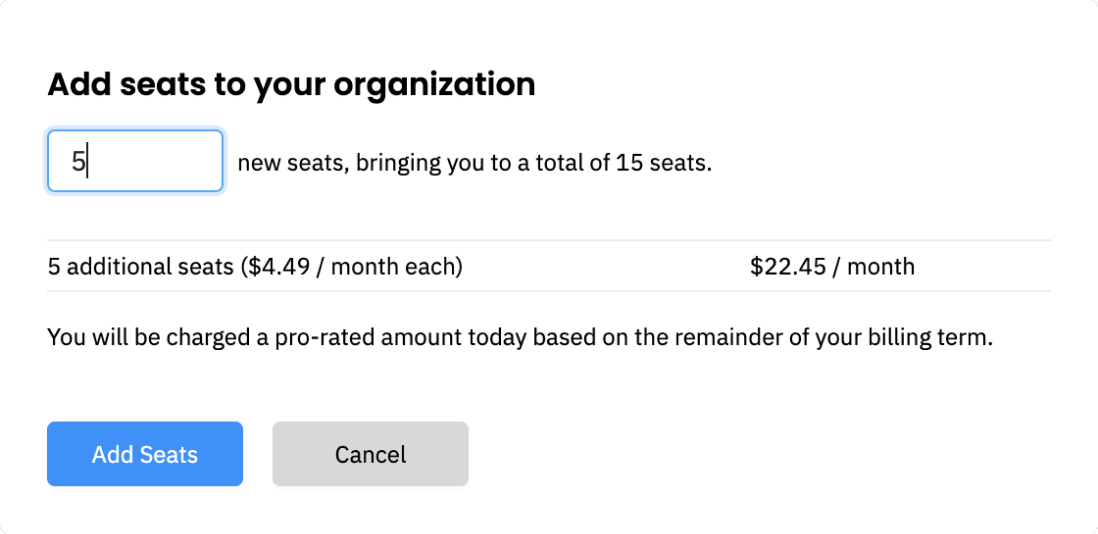
Adding or removing seats
Go to Billing tab and find the Subscription settings. Here you can see a number of seats you’ve purchased when creating an organization. You can always add or remove seats by clicking on the corresponding button.

If you add more seats to your organization, you will be charged at once based on the remainder of your billing term. Each new seat allows to add an extra member and raises a number of the total available usage. Note that the Organizational plan pools everyone’s usage together. So, if one of organization members doesn’t reach the monthly/yearly limit per seat, another member can use it.
If you remove seats, you will receive a pro-rated credit in the next billing cycle.
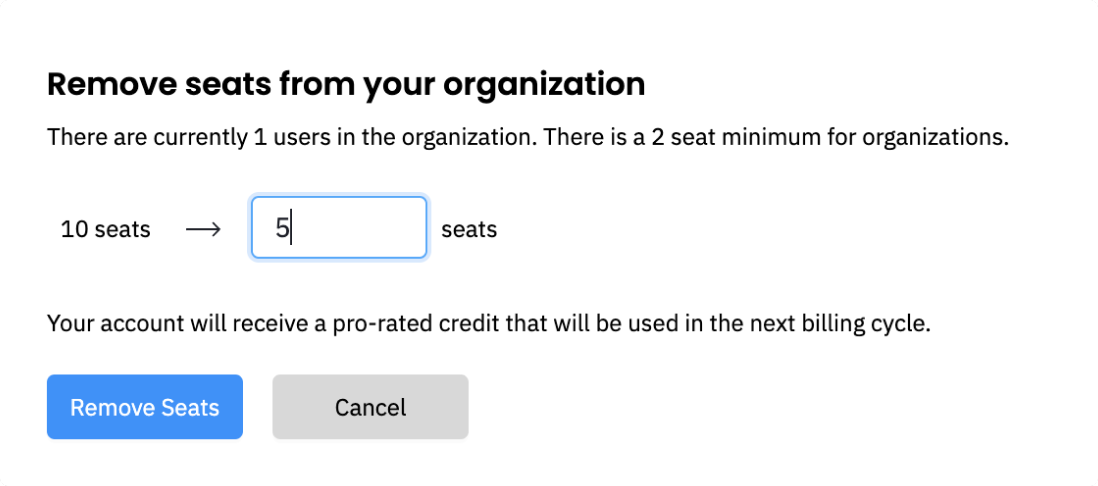
Please note that removing seats will reduce a total number of available usage which can be potentially used by other organization members.
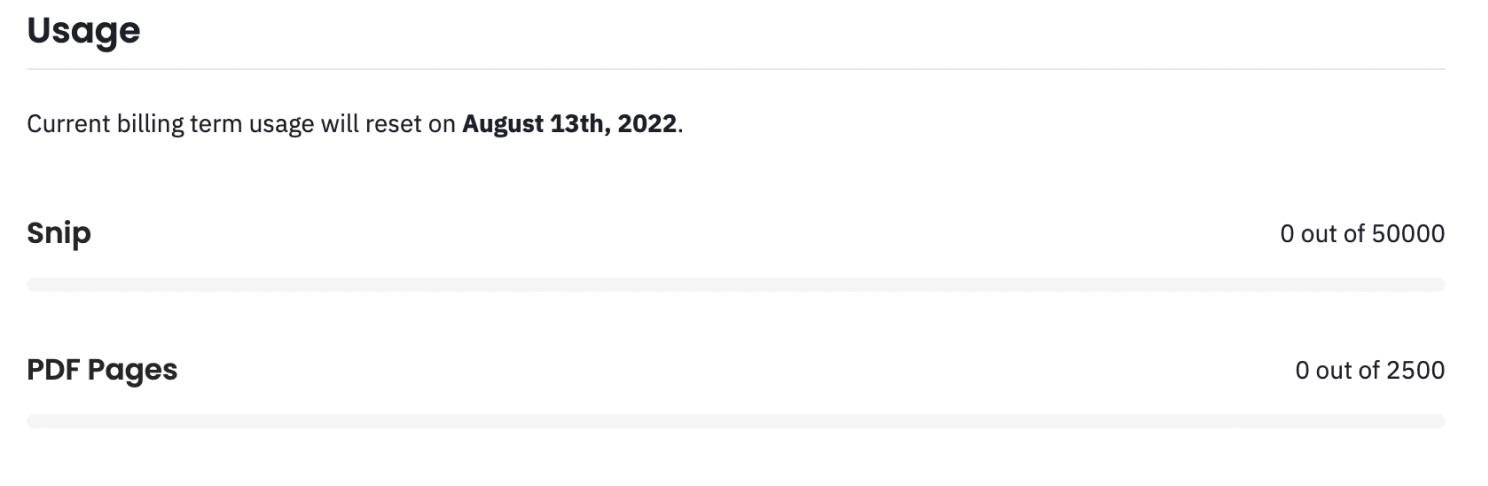
On the Billing tab you can also find information about organization’s available usage.
Admin seat policy
Please note that you will be charged for an admin seat too. If you are not expecting any usage for an admin seat, you should invite a user as a free admin. Free admins have the same permissions regarding managing the organization as regular admins, but all the usage of free admins is counted to usage of their personal account.
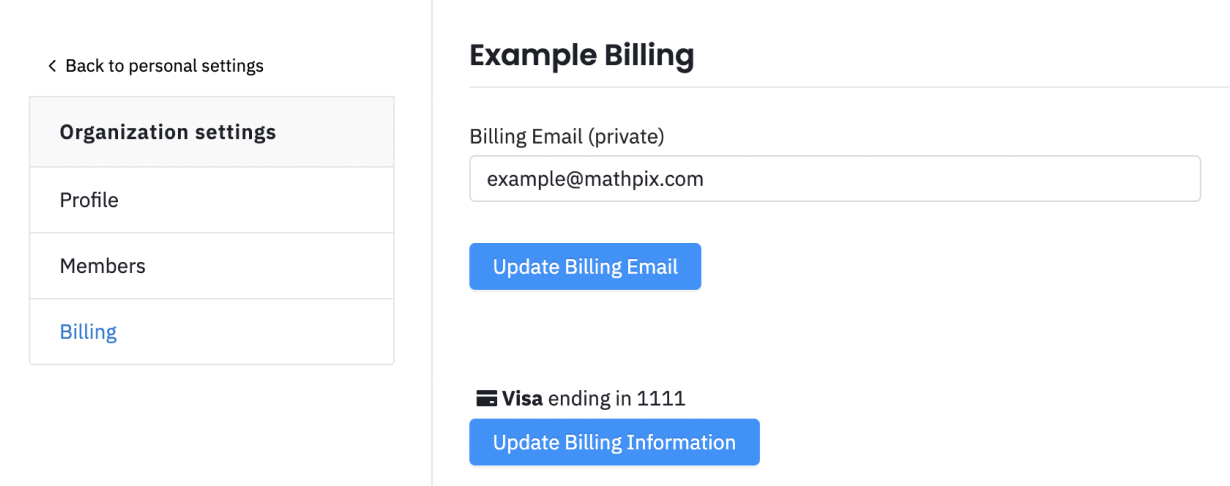
Updating billing information
To update your billing info, navigate to the Billing tab. Here you can change the billing email and payment method.
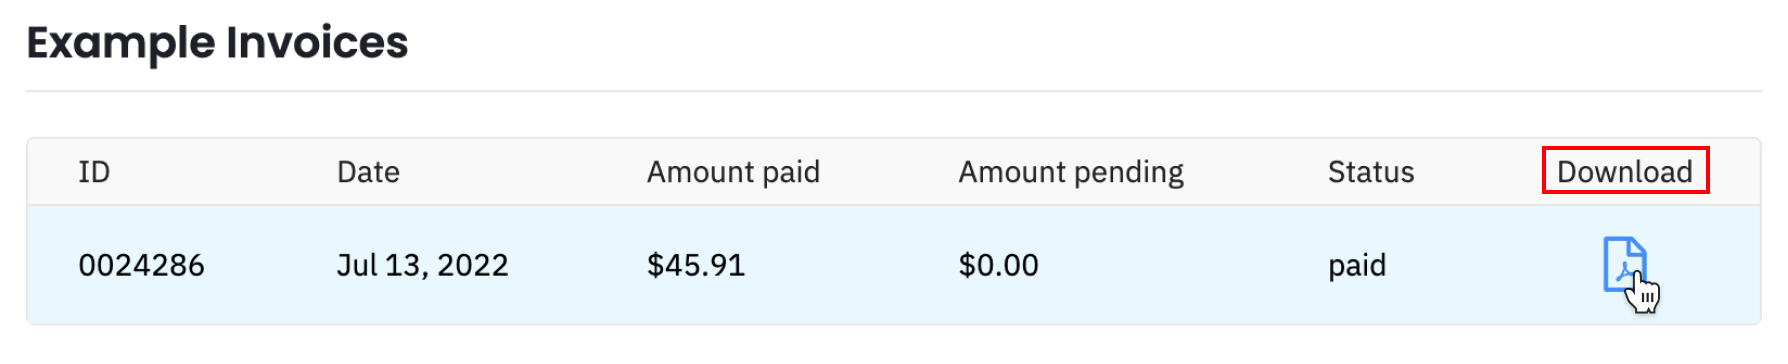
Downloading invoices
Scroll down to the end of a Billing page and find your invoices. Here you can download your invoice for each billing period.
Enabling Extra Usage for Organizations
To enable Extra Usage for your Organization, first select your Organization under the Snip Organizations tab.
Next, select the Billing tab:

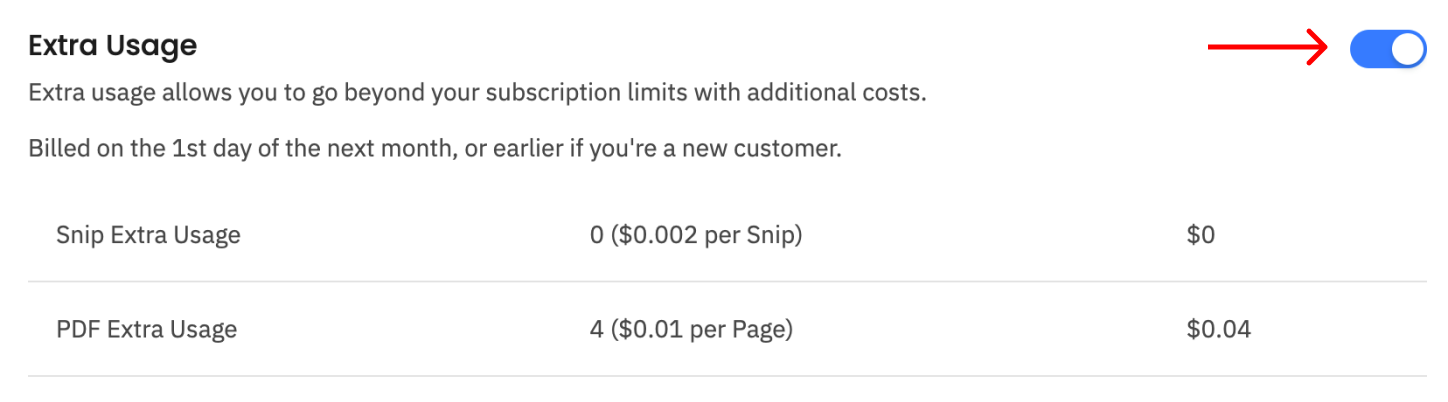
Finally, scroll down to Extra Usage and use the toggle on the right to enable:
Canceling Organizational Subscription
To cancel your Organizational Plan, go to your organization’s Profile page and scroll down to the Danger Zone section. Click Cancel Subscription.
You will see a confirmation dialog explaining that your subscription will remain active until the end of the current billing period. After confirmation, your subscription is scheduled for cancellation.
While the cancellation is pending:
- Your organization remains fully active until the billing period ends
- All plan change buttons are disabled
- You can undo the cancellation at any time before the billing period ends from the Danger Zone on the Profile page or the billing notice on the Billing page
At the end of the billing period, the subscription will be cancelled and member workspaces will be cleared. An admin can reactivate the subscription later by updating the payment method.
Deleting an Organization
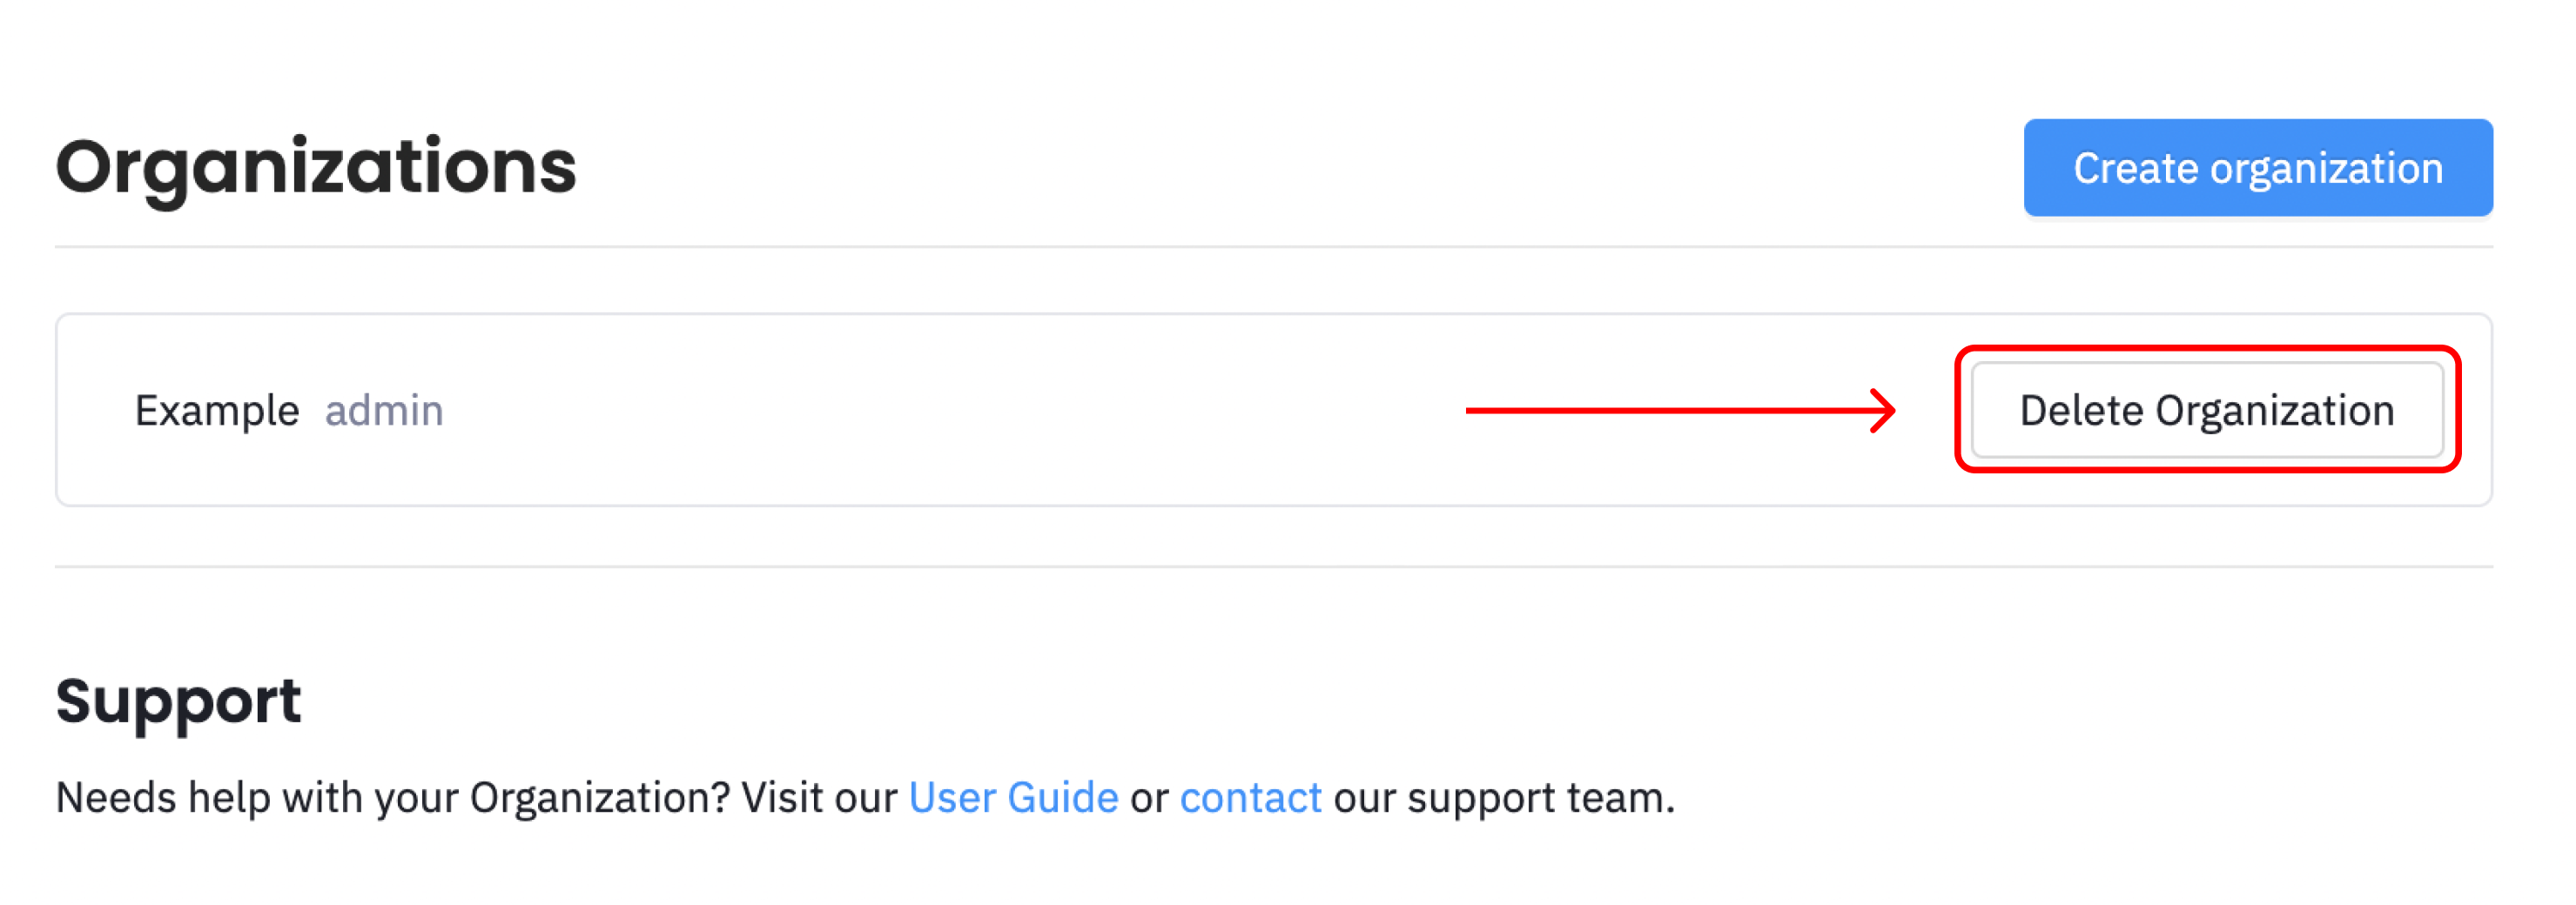
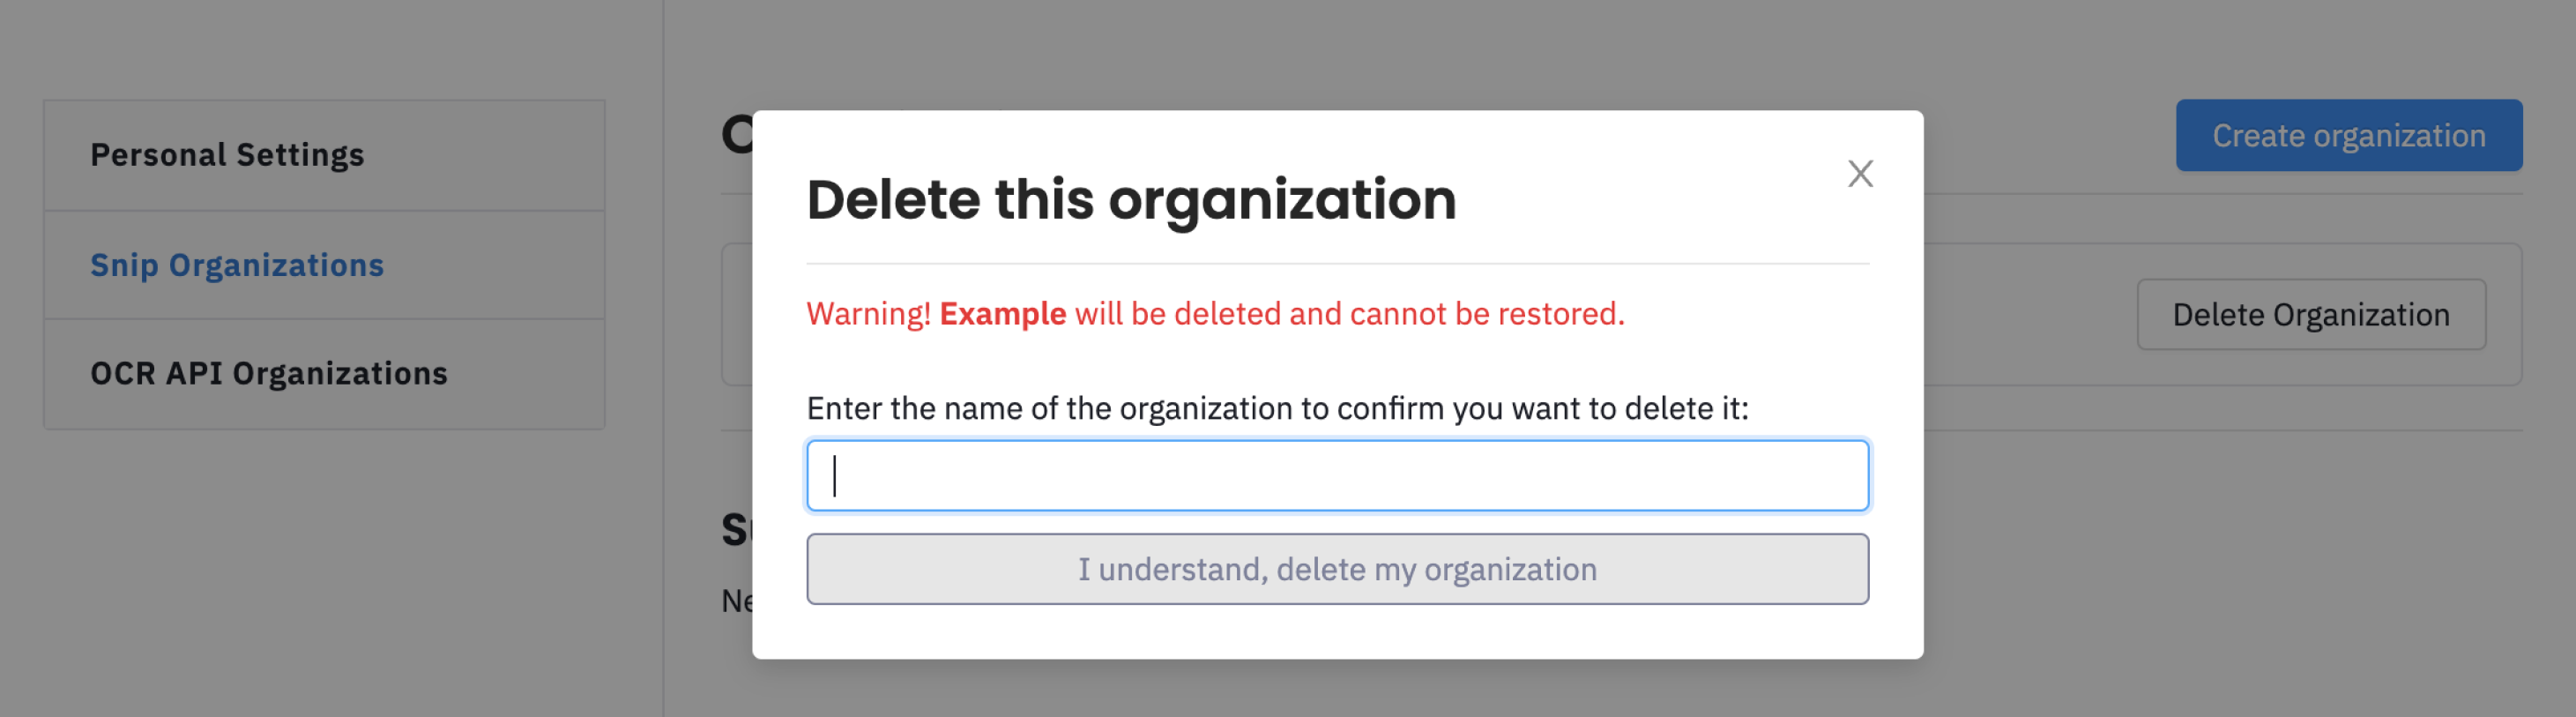
If you want to permanently remove your organization and all associated data, go to the Profile page, scroll to the Danger Zone section, and click Delete Organization.
This action cannot be undone. You will be asked to type the name of your organization to confirm.
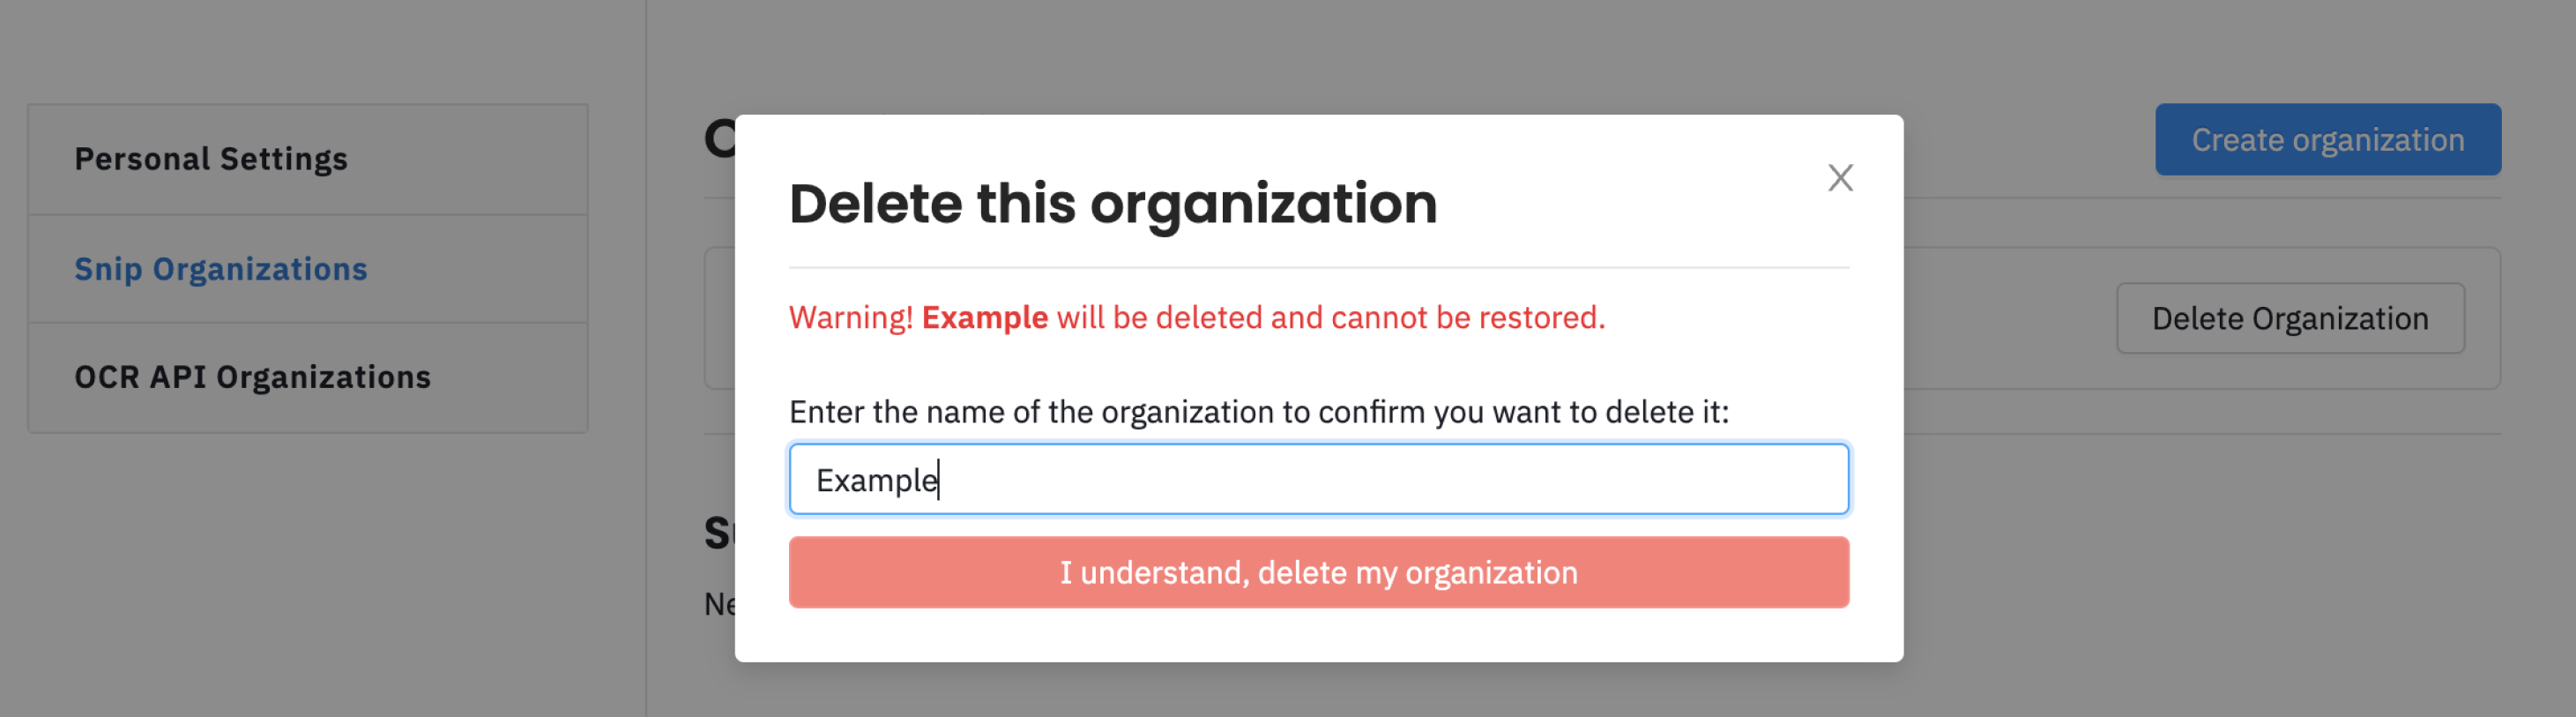
Once confirmed, your organization is permanently deleted and the subscription is removed.